Ground control points (GCPs)
Ground control points (GCPs) are surveyed targets on the ground. Marking them in the photos ties the reconstruction to your survey, so the outputs land on your coordinates instead of relying on the drone GPS alone.
GCP processing is available on the Plus and Pro plans. See pricing.
What you need
- At least 3 points, each with surveyed coordinates and a height.
- Each point marked in at least 6 photos. More marks give a steadier result.
- Vertical (nadir) RGB JPEG photos of the project. GCPs are marked in the RGB images only.
- A point file in
.csvor ODM.txtformat, smaller than 2 MiB.
Spread the targets across the whole site, near the edges and in the middle, rather than in a line or a cluster. Use high-contrast targets that are clearly visible from the flight altitude, and keep them in place until the flight is finished.
The workflow at a glance
- Upload the photos.
- Import the point file.
- Mark each point in the photos.
- Choose how the project is positioned, then start processing.
- Check the result in the viewer, and align the outputs if needed.
1. Add the point file
Once the photo upload finishes, the Ground control points panel appears below the upload. It is optional, a project can be processed without it.

Click Add points, then drop the file or choose it with Browse.
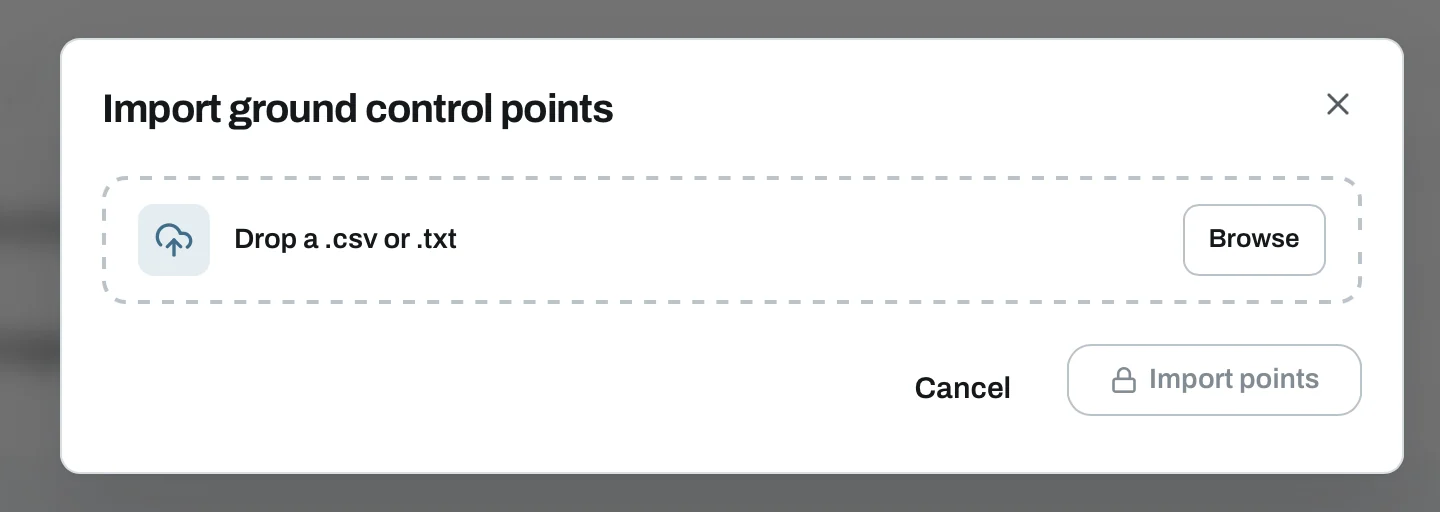
You can also drop the point file into the photo upload together with the images. It then opens in the panel automatically when the upload finishes.
2. Map the columns and coordinate system
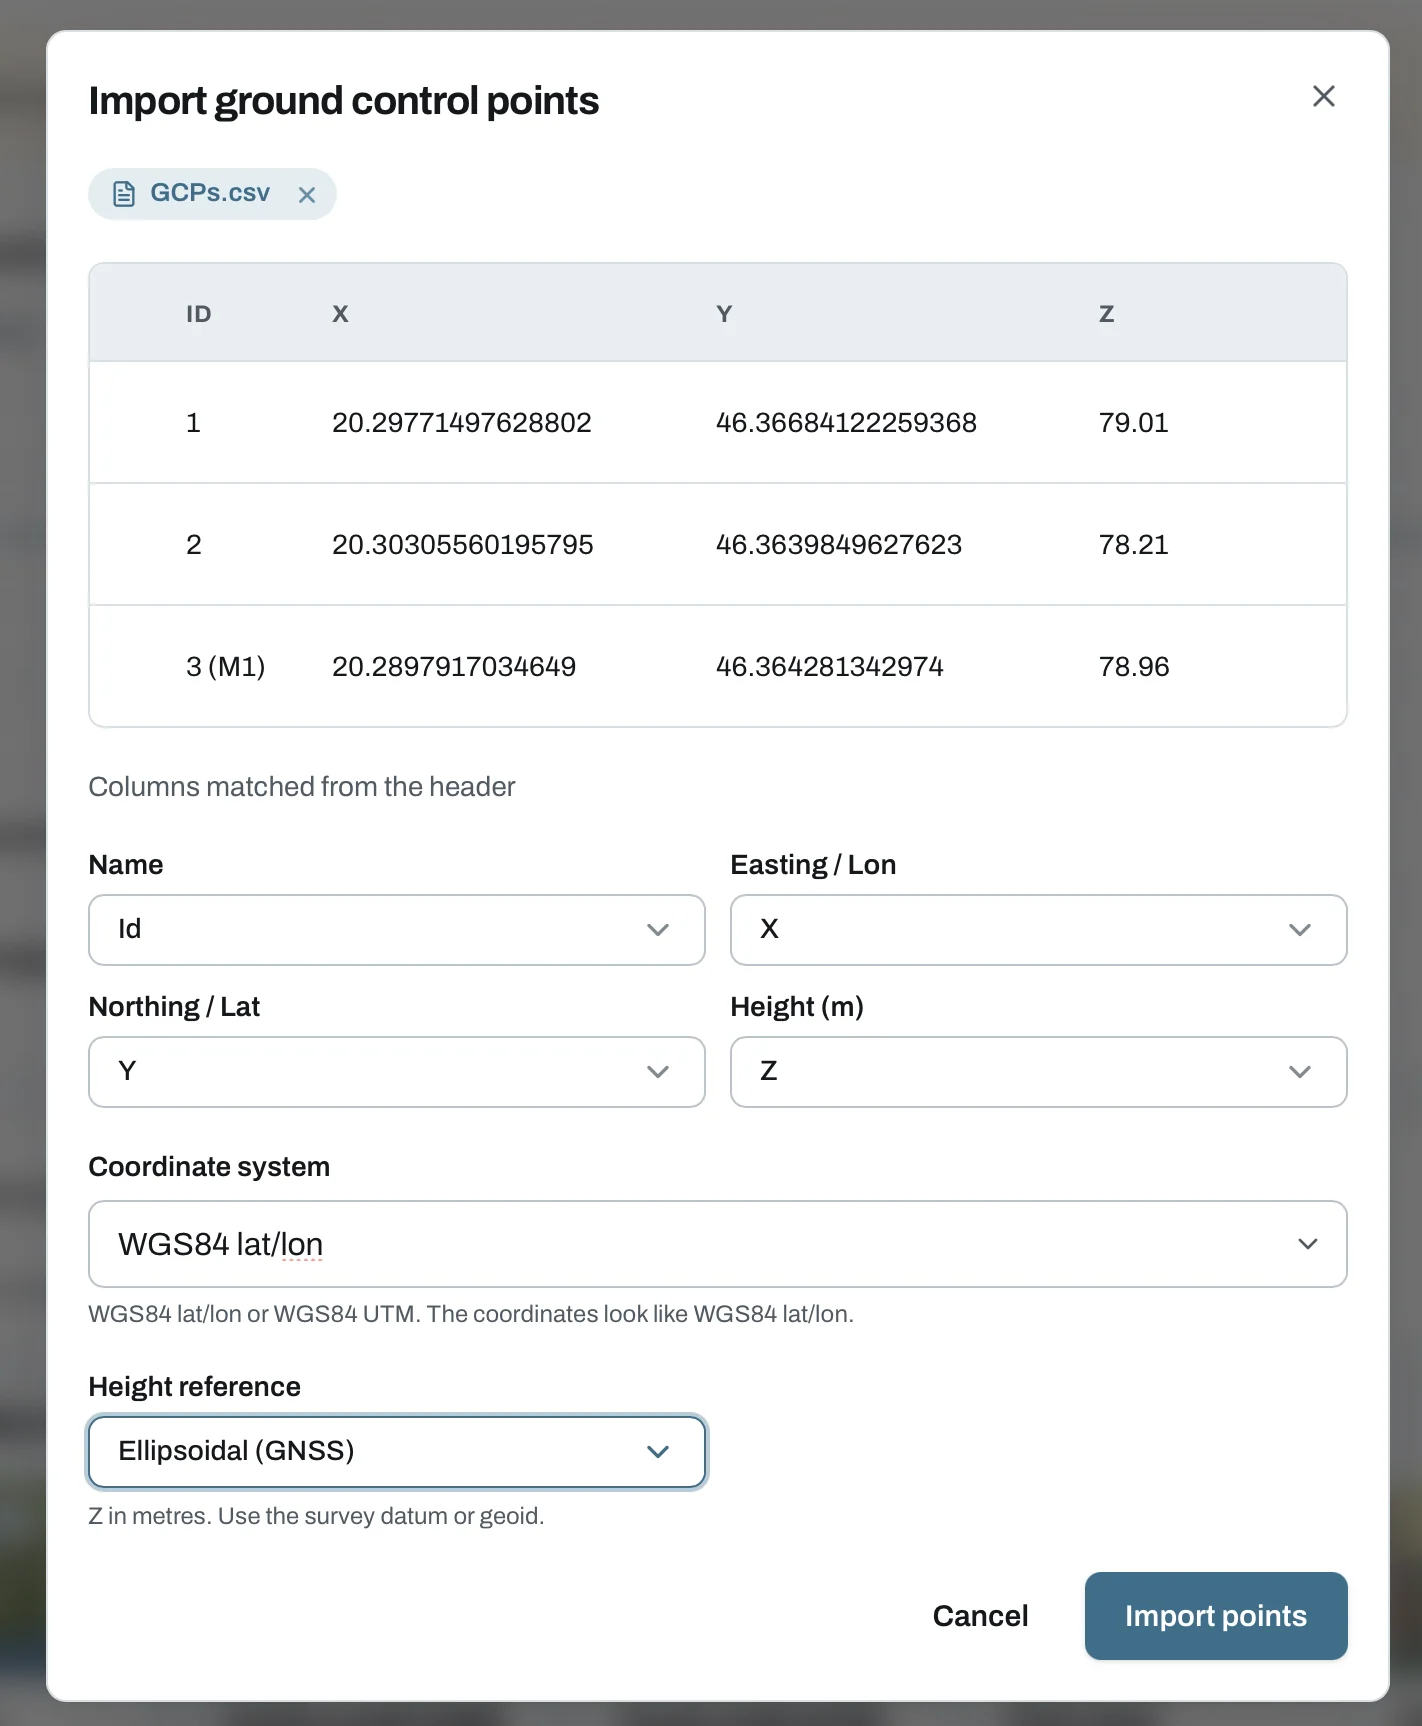
The dialog shows a preview of the points from the file. Check it before you import.
- Columns. Choose which column holds the name, the easting or longitude, the northing or latitude and the height in metres. When the header names are clear, the columns are matched automatically.
- Coordinate system. MapperTool suggests one from the coordinates or the photo locations. Check the suggestion and change it if needed.
- Height reference. Choose how the heights were measured, see below.
Click Import points when every field is set.
File formats
CSV with a header row, comma or semicolon separated. Point names must be unique, and coordinates use a decimal point.
name,lon,lat,height
GCP1,19.040236,47.497913,152.310
GCP2,19.041120,47.498402,151.874
GCP3,19.039655,47.498990,153.102
ODM gcp_list.txt. The first line is the coordinate system, then one row
per photo mark: x y z pixelX pixelY filename label. The marks are imported
with the points, so you only need to check them.
EPSG:23700
650123.45 240321.12 110.20 2412.5 1630.0 DJI_0042.JPG GCP1
Rows for check points (labelled CHK-) cannot be imported as GCPs.
Coordinate systems
| Coordinate system | Code | Notes |
|---|---|---|
| WGS84 latitude and longitude | EPSG:4326 | Longitude in the easting column. |
| WGS84 UTM, any zone | EPSG:326xx, EPSG:327xx | Points must be inside the zone. |
| EOV (HD72), Hungary | EPSG:23700 | Points must be inside Hungary. |
In EOV the Y column is the easting and the X column the northing. If the columns are mapped the wrong way round, the import shows a warning with a Swap columns button.
Height reference
- Ellipsoidal (GNSS). WGS84 ellipsoidal height, as most GNSS receivers record it.
- Baltic (EOMA 1980). Hungarian levelled heights. They are converted with the Hungarian geoid model of BME (2014), inside Hungary only.
Points with other geoid heights can be saved, but cannot be processed yet.
The outputs use WGS84 ellipsoidal heights, also when the points were given in Baltic heights. In Hungary the difference is about 39 to 46 metres.
3. Mark each point in the photos
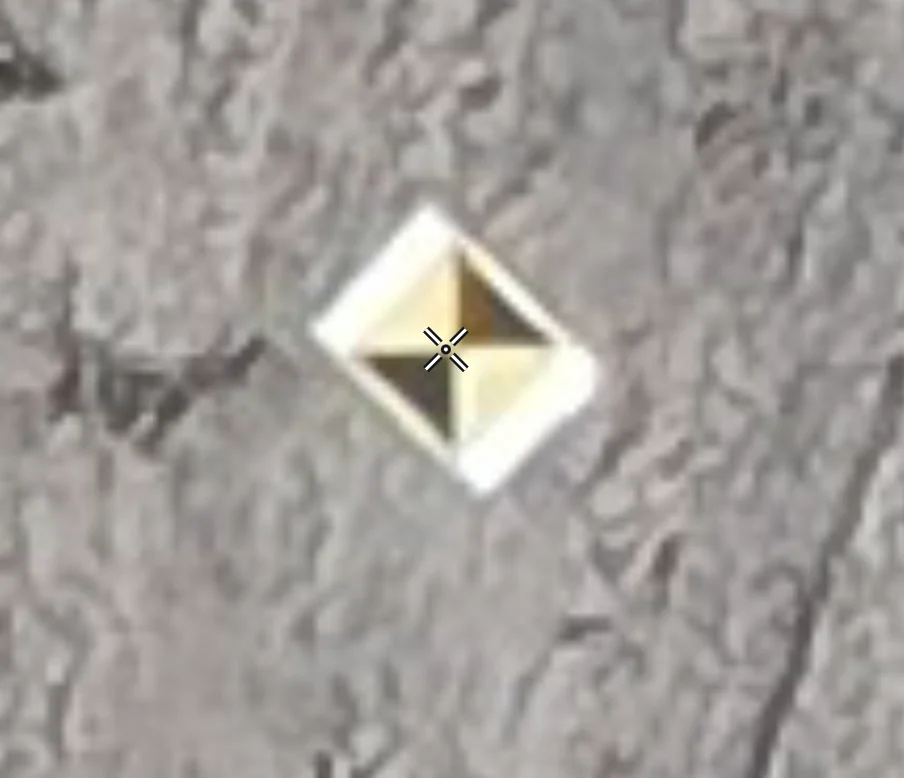
After the import the editor opens. Select a point on the left, find the target in the photo and click its centre.
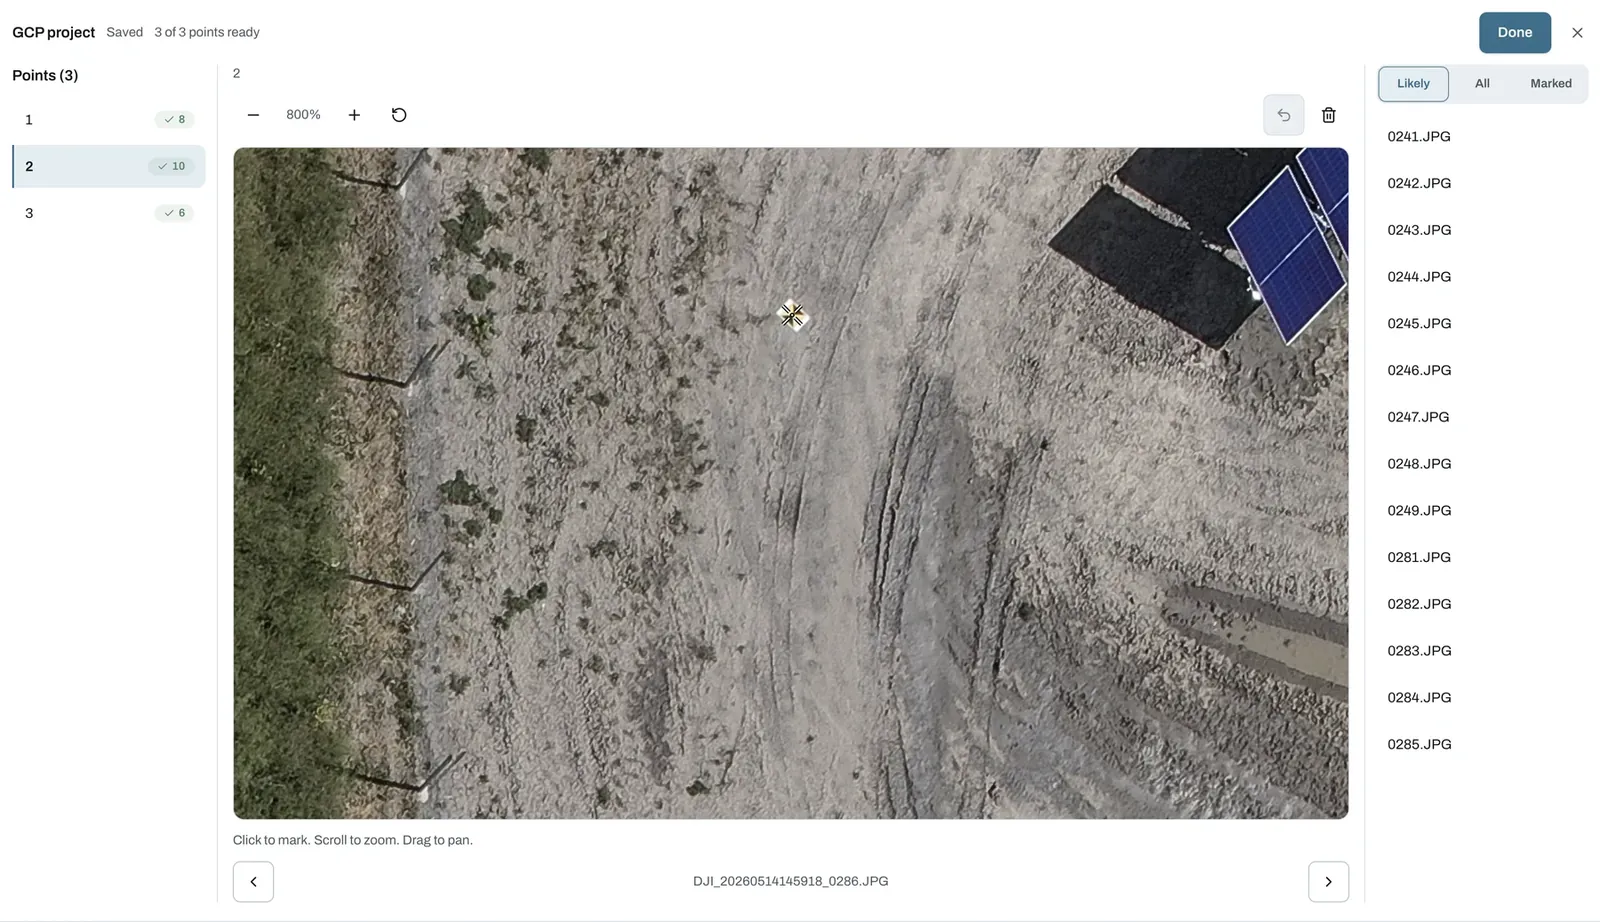
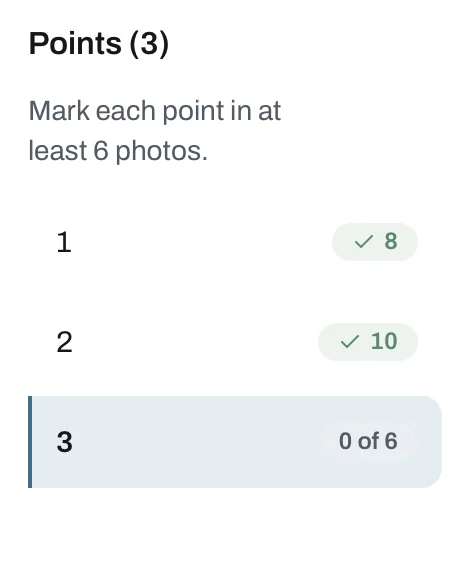
The point list shows how many photos each point is marked in. A point needs at least 6 marks. Until then it shows the progress, for example 0 of 6, and a green tick once it is ready.
In the editor you can also rename or delete a point. A deleted point is left out of processing together with its marks.
Find the photos that show the point
The photo list on the right has three filters:
- Likely. Photos that probably show the point, estimated from the camera positions.
- All. Every photo in the project.
- Marked. Photos where the point is already marked.
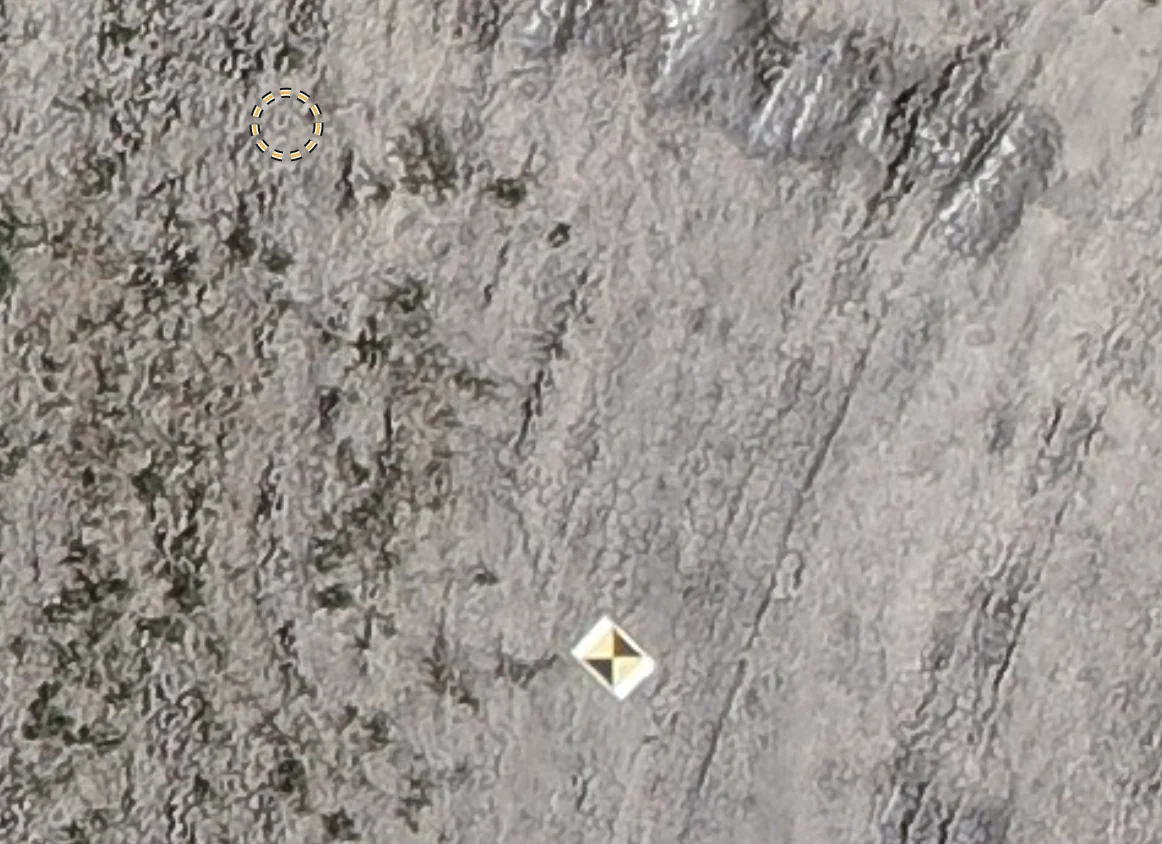
The estimate assumes the ground is near the takeoff height, so it is approximate. The dashed circle shows where the target is expected. Look around it and click the real target.
Marking tips
- Scroll to zoom and drag to pan. Zoom in until you can click the centre of the target precisely.
- After a mark, the next photo opens automatically in about two seconds. This leaves time to adjust or undo the mark.
- Undo removes the last mark, the bin icon deletes the mark in the current photo.
- Your work is saved automatically. The header shows Saved and how many points are ready, for example 3 of 3 points ready.
Click Done when every point has enough marks.
4. Choose how to position the project
When the points are ready, the panel shows Ready with the number of points and photo marks. Choose an option under Position with before you start processing.
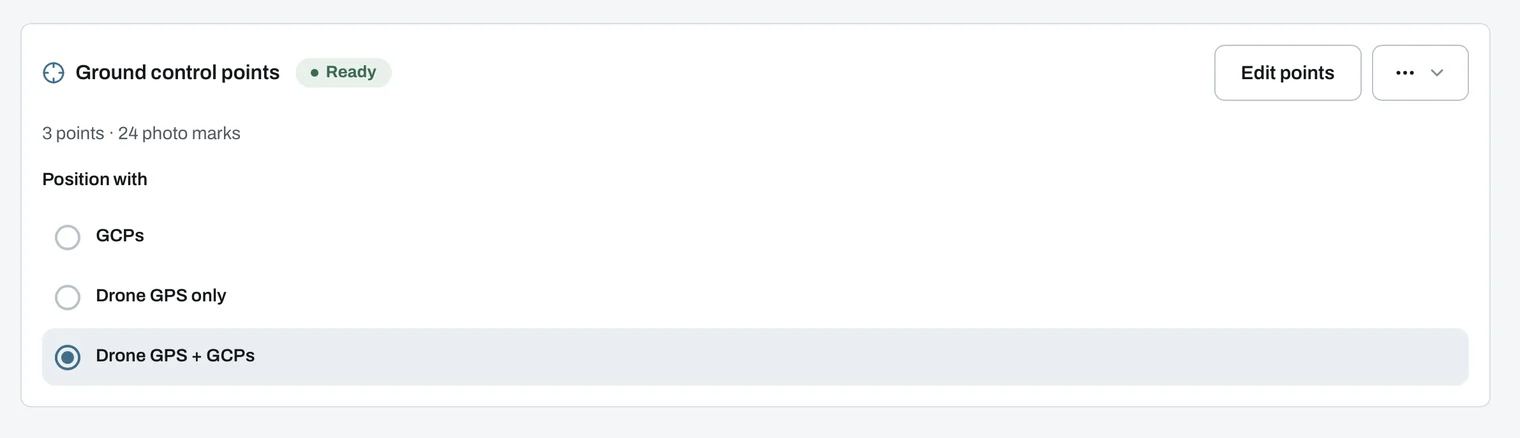
- GCPs. The ground control points set the position of the outputs.
- Drone GPS only. The points are kept, but this run ignores them.
- Drone GPS + GCPs. Both are used, the ground control points refine the position from the drone GPS.
Edit points reopens the editor. The ⋯ menu has Replace points, to import a new point file, and Export points, to download the point set with its photo marks.
The points cannot be edited while photos are uploading or the project is processing.
After processing
The finished outputs keep the positioning they were processed with. Later edits to the points apply to the next run only. Use Open in viewer to check the result on the map.
The points in the viewer
Projects processed with GCPs get a separate GCPs tab in the viewer. In the 2D map view, each point appears on the orthomosaic at its surveyed position, with its name.
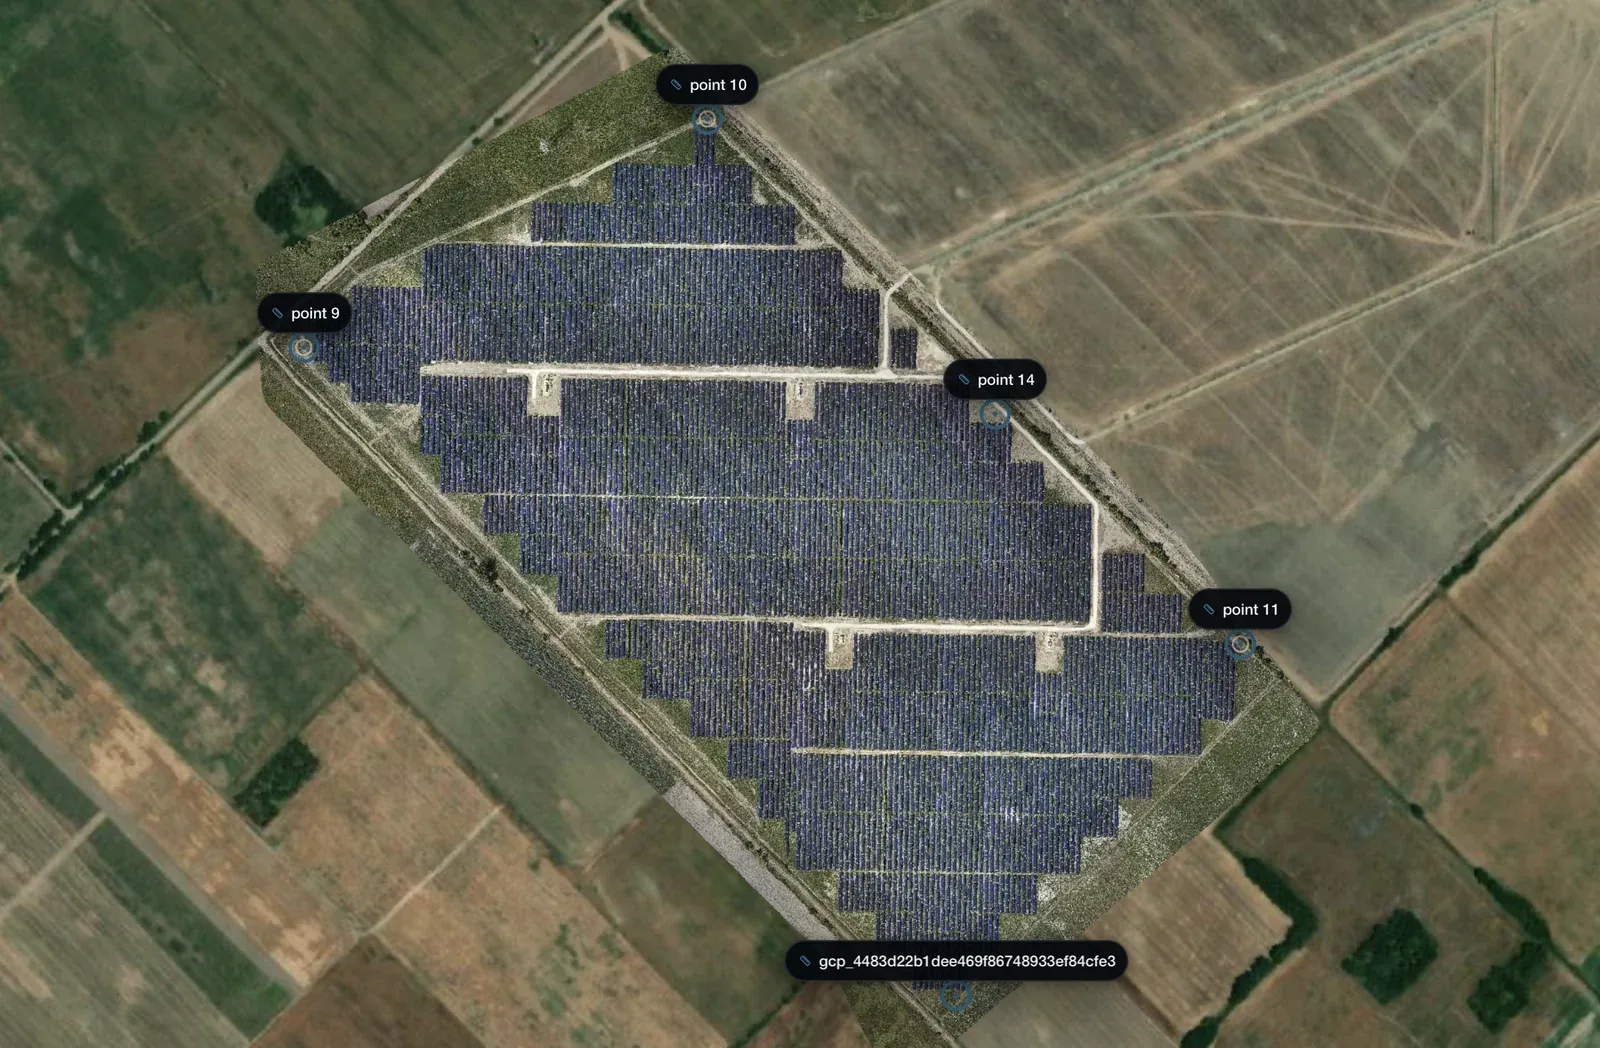
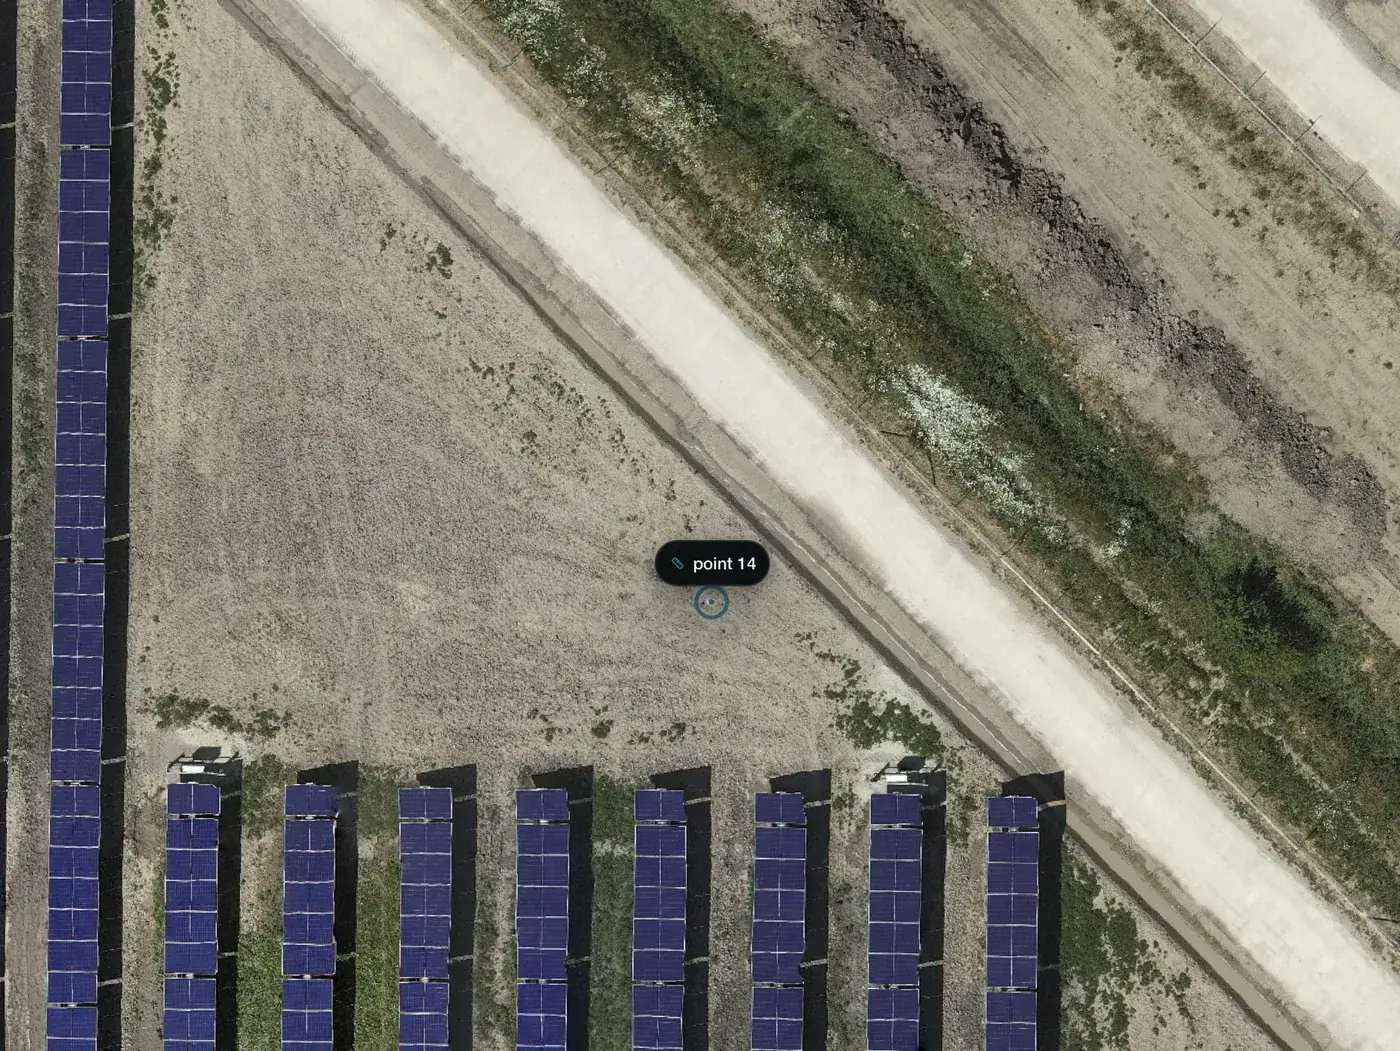
The GCPs tab lists the points and shows how the project was positioned, for example Positioned with GCPs (5 points).
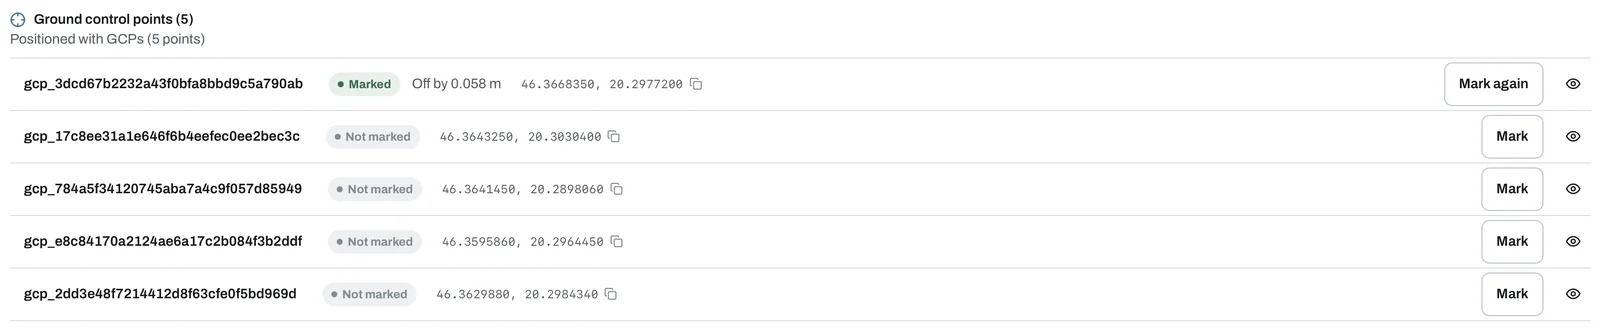
- The point name. Click it to zoom the map to the point.
- Marked or Not marked, whether the point has a mark on the orthomosaic. Re-mark needed appears when the orthomosaic has changed since the mark was made.
- Off by. The horizontal distance between the surveyed position and your mark. Hover over it for the east and north components.
- The coordinates in WGS84, with a copy button.
- The eye icon shows or hides the point on the map.
Check how the map fits the survey
- Click Mark next to a point. The map zooms to its surveyed position.
- Click the centre of the target where it actually appears on the orthomosaic.
- The row shows the offset, for example Off by 0.058 m, which is 5.8 cm.
Mark again replaces the mark. Marking never changes the surveyed coordinates. Each mark is also saved as a check point, listed in the same tab.
Align the outputs to the GCPs
If the finished outputs are shifted from your survey, Align to GCPs moves them onto the points without processing the project again. It is available to the project owner once processing has finished, and needs at least 3 points with a current mark. Manual check points with a current mark count too.
- Click Preview alignment and select the points to use.
- Click Calculate preview to see the east and north offset, the RMSE before and after, and the remaining error of each point.
- Click Apply to outputs. The adjusted outputs are created in the background, you can leave the page while it runs.
Every finished output moves together, the orthomosaic, the elevation models, NDVI, thermal and the point cloud. The originals are kept, and Restore original outputs switches back to them.
The alignment is one horizontal shift for the whole project. It does not correct heights, rotation, scale or local distortion. All outputs must use the same WGS84 UTM coordinate system, and the shift can be at most 1000 m. After the alignment the marks become outdated, and a display crop or 3D masks are cleared until you restore the originals.
Common problems
- Mark this GCP in at least 6 different photos. Open the point and mark it in more photos.
- Add at least 3 ground control points. Import a file with more points.
- The coordinate system is not supported. Use one of the systems above.
- Check the point coordinates. A point is outside the zone, or outside Hungary for EOV and Baltic heights, or the easting and northing are swapped.
- Two points share the same surveyed coordinates. Check the point file for duplicate rows.
- The source photos changed. The marks belong to a previous upload. Import the point file again for the current photos.
- GCP processing is not included in your plan. Choose Drone GPS only, or upgrade to Plus or Pro. Your saved points are kept.