Map layers and basemaps
The viewer renders your results as layers on an interactive map. Pan and zoom as on any web map, and switch layers with the buttons in the top left corner.
Available layers
Only the outputs the project was processed with appear:
- Orthomosaic map. The stitched photo map.
- Digital Surface Model. Height including buildings and vegetation, with a colour ramp and legend.
- Digital Terrain Model. Bare ground height, same treatment.
- NDVI vegetation map. Vegetation index, from multispectral imagery.
- Thermal. Surface temperature, from radiometric imagery.
Good to know
If you uploaded RGB and multispectral or thermal images in one project, each sensor appears as its own layer here, over the same area.
Display settings
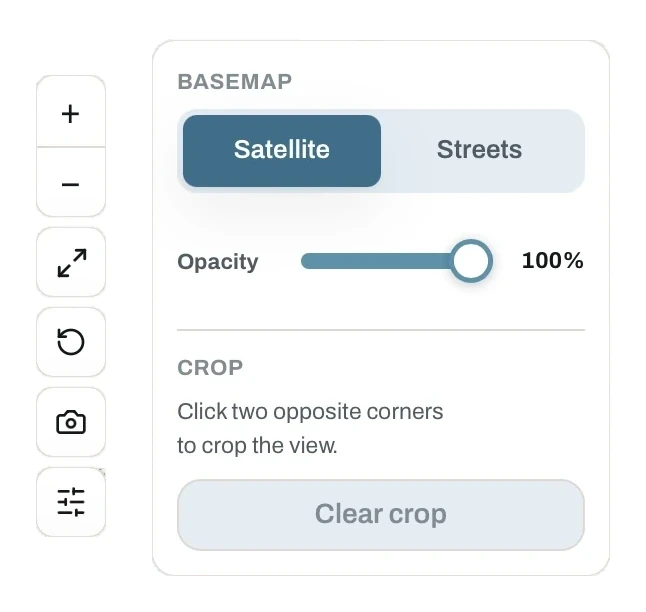
The control stack on the right holds:
- Zoom in and out, and fit to the result.
- Reset view, back to the starting position.
- Screenshot, which saves the current map view as an image.
- Settings, which opens the panel below it.
In the settings panel:
- Basemap. Satellite or Streets underneath your layer.
- Opacity. Fade your layer to compare it against the basemap.
- Crop. Restrict the view to one part of a large site. For a free-form cut use the lasso clip tool instead.
What to look for
Switching between the orthomosaic and the DSM is the quickest sanity check on a project:
- Coverage gaps in the middle of the site.
- Warping at the edges of the flight area.
- Noisy patches over water or featureless surfaces.
Tip
Do this before you download files or send a share link. If something looks wrong, the cause is usually already visible in the quality check.
To take readings on a layer, continue to measuring on the map.